Figure 3.1:
Matching document name in Geneious with Sample ID column in spreadsheet
In Geneious Prime 2020.1 onwards you can add metadata to your Geneious documents by importing it from a .csv or .tsv file. Importing metadata from an Excel spreadsheet file in .xlsx format is supported in Geneious Prime 2022.1 onwards. Your file of metadata needs to have one field in common with the documents you want to import the data onto, such as the name or sequence ID field, so that Geneious can match the data to the correct document.
Prior to importing the file, the metadata fields you plan to add from your spreadsheet need to be set up in Geneious. To check which fields are present and to add new fields, select any document and go to the Info tab. Click Edit Metadata types to see the list of fields currently available in Geneious. For a step by step guide to adding new metadata fields, see How do I add custom metadata fields to my sequence?
Once the appropriate metadata fields are set up, you can proceed with importing your data.
To do this, first select the folder containing the documents you want to add the metadata to. Then go to File → Import → Files..., select CSV/TSV or as the format, and select your file of metadata. Or alternatively, drag and drop the file of metadata directly into Geneious.
In the Import Documents window, click on Metadata as the type of document to import.
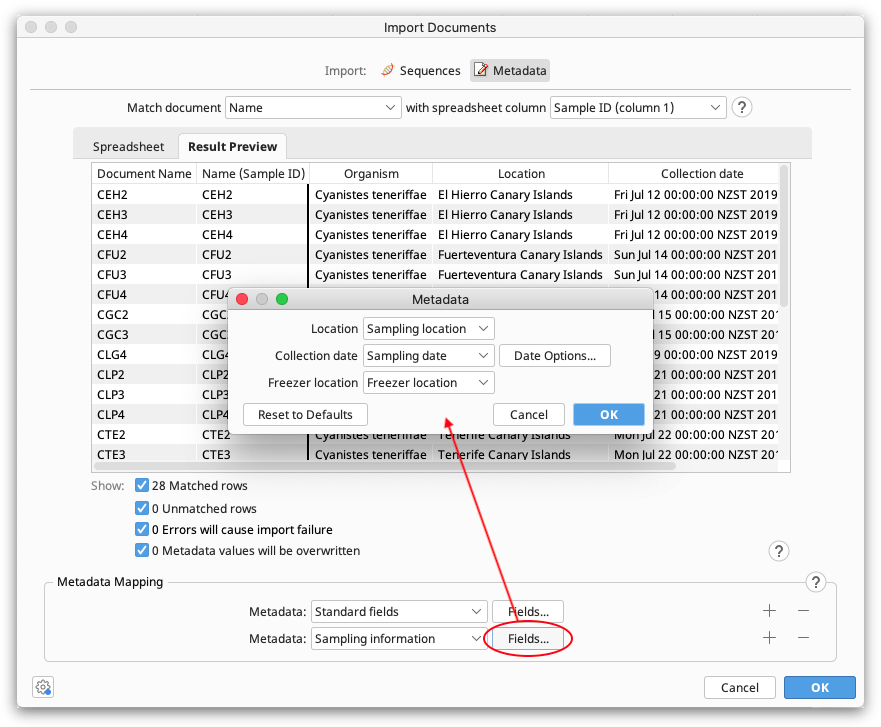
Under Match document, select the Geneious document field that should be used to match the spreadsheet data in the first dropdown menu. In the second dropdown menu, select the spreadsheet column that contains the matching data.
For example, if you have a ”Sample ID” column in your spreadsheet that corresponds to the appropriate document names in Geneious, you should select to Match document [Name] with spreadsheet column [Sample ID] (see figure 3.1 ).
Notes:
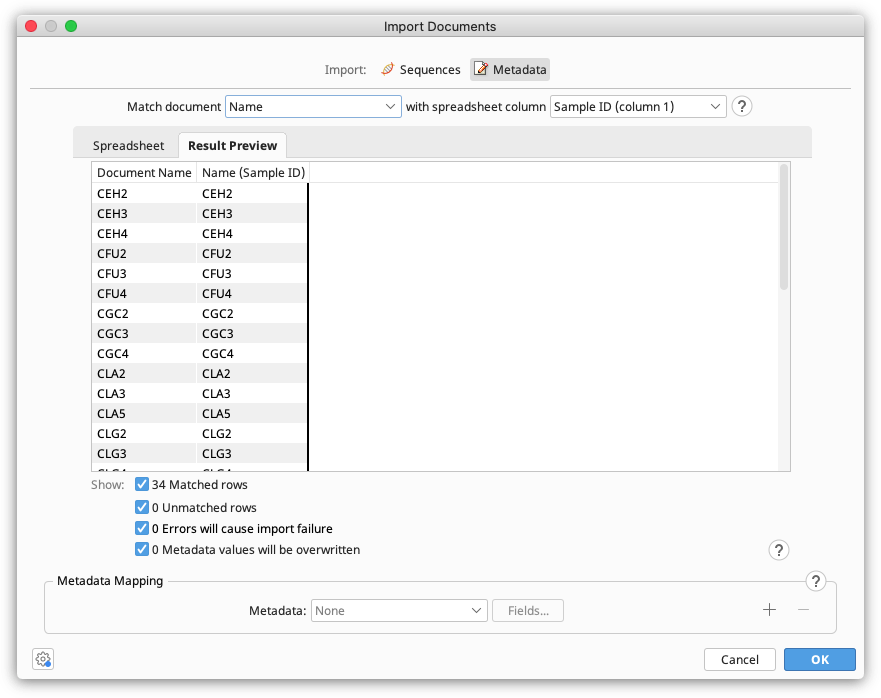
The Spreadsheet tab in the preview window shows the data in the spreadsheet file. The Result Preview tab shows the matching fields in the Geneious document and spreadsheet, and shows the metadata that will be added (Metadata mapping needs to be set up before this is populated).
Colors are used to highlight information about the import (see Figure 3.2 ). Hover your mouse over a coloured value for more information about the notification or error.
Blue: The spreadsheet row does not match any documents in the selected folder. Check that the correct Geneious field and spreadsheet column has been selected for matching, and ensure that corresponding match values are identical in the Geneious field and spreadsheet cell. Note that match values are case sensitive.
Yellow with Asterisk: The metadata field in Geneious already contains data, which will be overwritten on import. The preview shows the new value that will be imported from the spreadsheet. To see the old value, hover your mouse over the cell. Once metadata has been imported it cannot be undone and any overwritten data will be lost.
Red with Warning Icon: There is an error which will prevent the import from proceeding. Errors will occur when:
All errors must be resolved before commencing the import operation.
The checkboxes below the preview table allow you to filter which rows are displayed. These filters do not affect the import operation. Geneious will apply metadata changes on all matched rows once there are no errors.

In this section, specify which columns from the spreadsheet should be imported, by assigning spreadsheet columns to metadata fields on the Geneious document.
In the Metadata dropdown menu, choose the Geneious metadata field you want to add spreadsheet data to. All metadata types currently available in your database should show up here, including those you added yourself. If you wish to add a new type, you can do this on any document under Info → Edit Metadata types. The Standard fields type includes generic fields such as Name, Description, Accession, Organism, Taxonomy and Notes. Click the + button to add fields from more than one metadata type. Then click the Fields button to specify which columns in the spreadsheet should be mapped to which field in Geneious.
For example, in the screenshot below the spreadsheet columns for Sampling Location, Sampling date, and Freezer location have been added under the Sampling Information metadata type, and the Organism column has been added under the Standard Fields type.
The Result Preview table will be updated automatically when spreadsheet columns are mapped to metadata fields.
Once you are happy with how the import looks, click OK to load the metadata. You should now see the metadata in the document table (you may need to scroll to the right hand side of the table to see the new columns).