Figure 13.5:
Primer design output
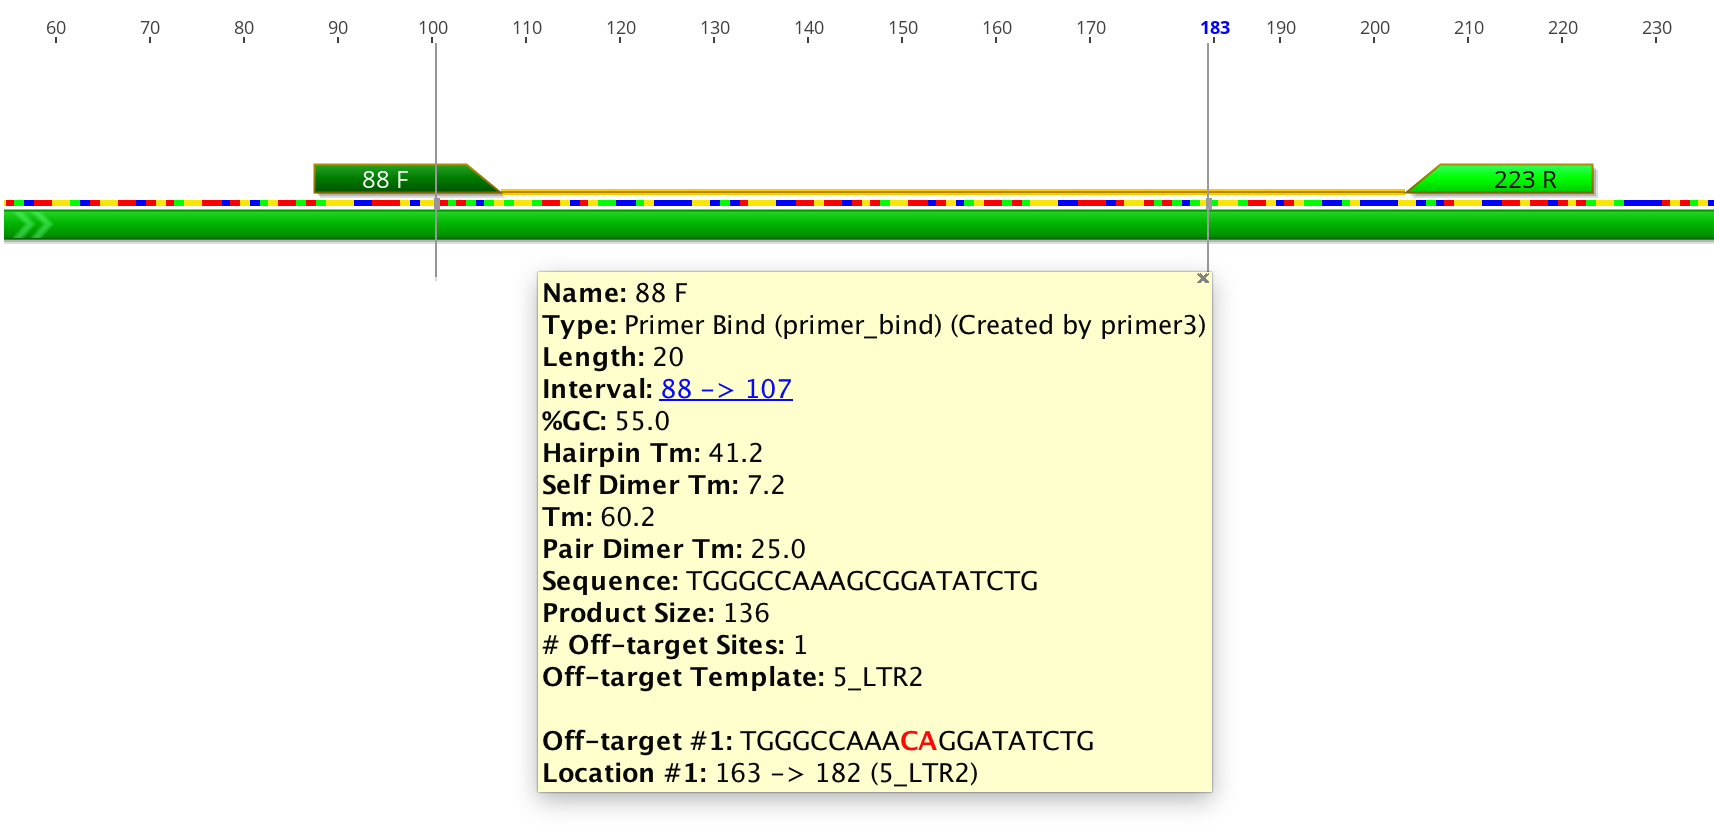
Once the task and options have been set, click the OK button to design the primers. A progress bar may appear for a short time while the process completes. When complete, primers and probes will be added as annotations on the sequences. The annotations will be labelled with the base number the primer starts at, followed by either F (forward primer), R (reverse primer), or P (probe). Primers will be coloured green and probes red.
Detailed information such as melting point, tendency to form primer-dimers and GC content can be seen by hovering the mouse over the primer annotation. The information will be presented in a popup box. Alternatively, double clicking on an annotation will display its details in the annotation editing dialog. Table 13.1 shows how the values in the Geneious primer annotation map to the original Primer3 values. Note that in Geneious Prime 2020 onwards, for primers with 5′ extensions the primer length, Tm and %GC is calculated both with and without the extension. All other values including hairpin and self dimer Tm are calculated with extension included.
In Geneious Prime 2019.1 onwards, the primer annotation includes a list of Off-target sites for that primer, including their location and sequence. These are putative non-specific primer binding sites identified on the sequence that was used for primer design. The entire sequence will be searched for off-target sites, even if only a selected region is chosen for primer design. An off-target site will be listed if it has no mismatches to the first four 3′ bases of the primer, and less than 10% mismatches with the primer overall. Mismatches between the primer and off-target will be shown in red.
The best way to save a primer or DNA probe for further testing or use is to select the annotation for that primer and click the Extract button in the sequence viewer. This will generate a separate, short sequence document in oligo format which just contains the primer sequence and the annotation (which contains the primer characteristics). In the case of the reverse primer it will automatically be reverse complemented.
To delete primers that you don’t want, just select the primer annotation and click the Delete button. You will then be given the option to delete the pair of that primer at the same time.
|
|
|
|
| Geneious Primer Characteristics | Primer3 Web Interface | Primer3 Command Line |
|
|
|
|
| %GC | Primer GC% | PRIMER_{LEFT,RIGHT}_GC_PERCENT |
|
|
|
|
| Tm | Primer Tm | PRIMER_{LEFT,RIGHT}_TM |
|
|
|
|
| Hairpin | Max Self Complementarity (Any) | PRIMER_{LEFT,RIGHT,INTERNAL_OLIGO}_SELF_ANY |
|
|
|
|
| Primer-Dimer | Max 3′ Self Complementarity | PRIMER_{LEFT,RIGHT,INTERNAL_OLIGO}_SELF_END |
|
|
|
|
| Monovalent Salt Concentration | Concentration of monovalent cations | PRIMER_SALT_CONC |
|
|
|
|
| Divalent Salt Concentration | Concentration of divalent cations | PRIMER_DIVALENT_CONC |
|
|
|
|
| DNTP Concentration | Concentration of dNTPs | PRIMER_DNTP_CONC |
|
|
|
|
| Sequence | Seq | PRIMER_{LEFT,RIGHT}_SEQUENCE |
|
|
|
|
| Product Size | Product Size Ranges | PRIMER_PRODUCT_SIZE |
|
|
|
|
| Pair Hairpin | PAIR ANY COMPL | PRIMER_PAIR_COMPL_ANY |
|
|
|
|
| Pair Primer-Dimer | PAIR 3′ COMPL | PRIMER_PAIR_COMPL_END |
|
|
|
|
| Pair Tm Diff | Max Tm Difference | PRIMER_PRODUCT_TM_OLIGO_TM_DIFF |
|
|
|
|